Metal roofing offers exceptional durability‚ weather resistance‚ and energy efficiency‚ making it a popular choice for modern homes. Its sleek designs and eco-friendly benefits enhance property value significantly.
1.1 Benefits of Metal Roofing
Metal roofing provides exceptional durability‚ lasting up to 50 years or more‚ and withstands harsh weather conditions like heavy rain‚ hail‚ and high winds. It is fire-resistant‚ reducing insurance costs‚ and requires minimal maintenance. Energy-efficient coatings can lower utility bills by reflecting solar rays. Metal roofs are eco-friendly‚ as they are recyclable and reduce waste. They also resist pests and mold‚ ensuring a safer and cleaner home environment. Additionally‚ metal roofing enhances curb appeal with sleek designs and can increase property value significantly.
1.2 Types of Metal Roofing
Metal roofing comes in various materials and styles‚ each offering unique benefits. Galvanized steel‚ aluminum‚ and zinc are common options‚ known for their durability. Standing seam panels are popular for their sleek‚ modern look and concealed fasteners. Corrugated metal roofing features a wavy pattern‚ ideal for rustic designs. Screw-down panels are budget-friendly but less durable. Additionally‚ coatings like Galvalume and finishes such as PVDF enhance weather resistance and aesthetics. Each type suits different architectural styles‚ allowing homeowners to choose based on their preferences and climate needs.
Preparation for Installation
Ensure the roof is clear of debris‚ inspect for damage‚ and verify measurements. Check roof pitch and structural integrity. Secure loose elements and prepare the surface for installation.
2.1 Steps to Prepare the Roof
Begin by clearing debris‚ removing old roofing materials‚ and inspecting for damaged or rotten wood. Ensure all nails and sharp objects are removed. Measure the roof accurately and mark the area for installation. Check the roof pitch to confirm it meets the minimum requirement for metal roofing. Verify structural integrity and ensure the surface is level. Apply a weatherproof barrier if necessary and secure loose elements like flashing or vents. Proper preparation ensures a smooth and safe installation process.
Tools and Materials Needed
Essential tools include drills‚ screwdrivers‚ and measuring tapes. Materials needed are metal panels‚ underlayment‚ fasteners‚ and safety gear like gloves and harnesses for secure installation.
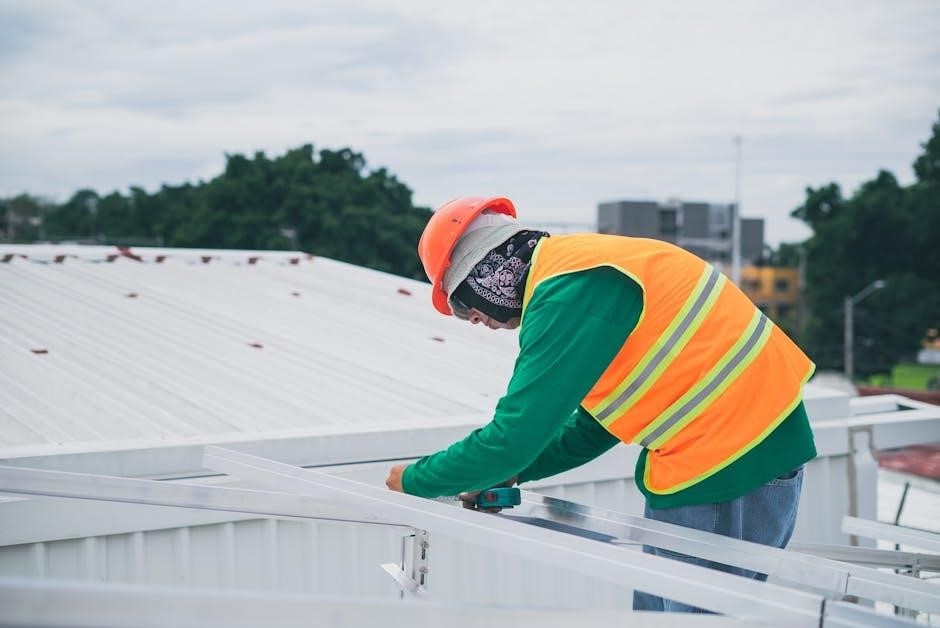
3.1 Essential Tools and Safety Gear
Installing metal roofing requires specific tools and safety equipment. Essential tools include drills‚ screwdrivers‚ measuring tapes‚ and utility knives for cutting panels. Safety gear like harnesses‚ gloves‚ and safety glasses is crucial to prevent accidents. A ladder or scaffolding is necessary for roof access. Fall protection equipment‚ such as roof anchors and ropes‚ ensures safety while working at heights. Proper footwear with traction is also recommended to prevent slips. These tools and gear ensure a safe and efficient installation process‚ protecting both the installer and the property. Always inspect equipment before use to maintain safety standards;
3.2 Materials Required
The essential materials for metal roofing installation include high-quality metal panels‚ underlayment‚ fasteners‚ flashing‚ fascia boards‚ and drip edges. Metal panels are typically made from galvanized or coated steel‚ available in various thicknesses like 0.5mm or 0.7mm. Underlayment options include synthetic or asphalt-saturated felt for weatherproofing. Durable fasteners‚ such as galvanized or stainless steel screws‚ ensure secure panel attachment. Flashing materials‚ like rubber or PVC‚ are used for watertight seals around vents and chimneys. Fascia boards and drip edges protect roof edges and enhance aesthetics. Sealants are also necessary for additional protection against leaks.
Installing the Underlayment
Begin by laying synthetic or asphalt-saturated underlayment across the roof deck‚ ensuring a clean‚ dry surface. Secure it with fasteners‚ overlapping edges for weather tightness.
4.1 Types of Underlayment and Installation
Common underlayment options include synthetic and asphalt-saturated felt. Synthetic underlayment is durable and water-resistant‚ while asphalt felt provides a traditional‚ cost-effective solution. Begin installation by rolling out the underlayment across the roof deck‚ ensuring a clean‚ dry surface. Secure it with fasteners or staples‚ maintaining proper tension to prevent wrinkles. Overlap edges by 6-12 inches for optimal weatherproofing. Ensure all valleys and ridges are covered‚ and cut material around vents or chimneys. Proper installation ensures a watertight base for metal roofing panels‚ enhancing long-term performance and protection.
Fascia and Drip Edges
Fascia boards and drip edges protect roof edges‚ preventing water damage and enhancing appearance. They are typically made of durable materials like metal or PVC‚ ensuring longevity.
5.1 Installation of Fascia Boards and Drip Edges
Ensure fascia boards are properly aligned with the roof edges and securely fastened. Drip edges should be installed along eaves and rakes to direct water away. Overlap edges by 1-2 inches and seal with waterproof material. Use durable materials like metal or PVC for longevity. Fasten fascia boards with screws or nails‚ spaced evenly. Ensure drip edges are tightly fitted to prevent gaps. Regularly inspect and maintain these components to avoid water damage. Safety precautions are essential when working at heights.
Metal Roofing Panel Installation
Begin by installing panels at the gable end‚ ensuring a 1-2 inch overhang. Secure panels with screws spaced 12-18 inches apart. Align panels carefully‚ sealing gaps to prevent leaks and ensure a weather-tight finish.
6.1 Step-by-Step Panel Installation Guide
- Position the first metal roofing panel at the gable end‚ ensuring it extends 1-2 inches beyond the fascia.
- Align the panel with the roof’s edge and secure it with screws‚ spacing them 12-18 inches apart.
- Install subsequent panels‚ overlapping each by 1-2 inches and aligning with the previous panel’s fasteners.
- Ensure panels are snug but not overtightened to avoid damage.
- Seal gaps between panels and edges with weatherproof sealant.
- Repeat the process‚ checking alignment and squareness as you progress.
- Finish by installing ridge caps and ensuring all fasteners are secure for a watertight fit.
Flashing Installation
Flashing is installed around chimneys‚ vents‚ and skylights to prevent water infiltration. Secure it tightly and seal gaps with weatherproof sealant for optimal protection.
7.1 Correct Techniques for Flashing
Ensure flashing is installed around chimneys‚ vents‚ and skylights to prevent water infiltration. Apply weatherproof sealant to all joints and edges. Secure flashing tightly to the roof deck and surrounding surfaces. Use compatible materials to maintain durability. Inspect for gaps or loose areas and seal promptly. Follow manufacturer guidelines for specific flashing types‚ such as valley or drip edge flashing. Regular maintenance is essential to ensure long-lasting protection against leaks and weather damage.
Ridge and Hip Installation
Proper alignment and secure fastening of ridge and hip sections are crucial. Ensure a watertight seal at these critical points to prevent leaks and weather damage.
8.1 Securing Ridge and Hip Sections
Proper installation of ridge and hip sections ensures a watertight and durable roof. Measure and cut sections to fit accurately along the roof’s peak. Align them precisely‚ centering over rafters. Secure with compatible fasteners‚ ensuring tight seals. Inspect for gaps or looseness. Apply sealants if necessary. Follow manufacturer guidelines for optimal results and longevity. Properly secured ridge and hip sections prevent leaks and enhance structural integrity. Always use high-quality materials for lasting performance. Regular inspections and maintenance are essential to uphold their effectiveness. Ensure all fasteners are tightly secured to withstand weather conditions.
Safety Precautions
Always wear safety gear like harnesses and gloves. Ensure proper ladder safety and avoid walking on oily or wet panels to prevent falls. Use extreme care when handling sharp edges and tools. Never work on a metal roof during bad weather. Regularly inspect equipment and follow manufacturer guidelines to ensure a safe installation process. Proper precautions protect both workers and the quality of the roofing system. Stay alert and maintain a clean workspace to minimize risks;
9.1 On-Site Safety Measures
Ensure all workers wear proper safety gear‚ including hard hats‚ safety glasses‚ gloves‚ and non-slip shoes. Use fall protection systems like harnesses and guardrails when working at heights. Secure ladders firmly and maintain three-point contact. Keep tools and materials organized to prevent tripping hazards. Avoid walking on panels with oil coatings to reduce slip risks. Inspect the roof for weak spots before starting work. Never install metal roofing during strong winds‚ rain‚ or lightning. Use proper lifting techniques to avoid injuries. Ensure all power tools are in good condition and properly grounded. Maintain clear communication among team members to prevent accidents.
Post-Installation Maintenance
Regularly inspect for loose fasteners‚ clean debris‚ and check for damage. Inspect seams and apply touch-ups to scratches or rust spots to maintain performance and longevity.
10.1 Tips for Regular Maintenance
Regular maintenance ensures longevity and performance of metal roofing. Inspect for loose fasteners‚ rust‚ or damage‚ and tighten or replace as needed. Clean debris from surfaces to prevent corrosion. Apply touch-ups to scratches or rust spots promptly. Ensure gutters are clear to direct water flow properly. Avoid walking on panels unnecessarily‚ as it may cause damage. Use soft brushes for cleaning to prevent scratching. Schedule annual inspections by professionals to address potential issues early. Maintain proper roof pitch to prevent water pooling. Regular upkeep enhances safety and extends the roof’s lifespan significantly.
Common Mistakes to Avoid
- Improper measurement and cutting of panels can lead to poor fits and leaks.
- Neglecting safety precautions increases the risk of accidents during installation.
- Ignoring manufacturer instructions may void warranties or cause installation failures.
- Incorrect flashing installation can result in water infiltration and damage.
11.1 Pitfalls in Metal Roofing Installation
Common pitfalls include improper measurement and cutting of panels‚ leading to poor fits and leaks. Ignoring manufacturer guidelines can void warranties and cause installation failures. Incorrect flashing installation may result in water infiltration. Neglecting safety precautions increases accident risks. Improperly securing panels can lead to wind damage or detachment. Using low-quality materials compromises durability and performance. Additionally‚ failing to inspect the roof deck for nails or debris can cause installation issues. Always ensure proper alignment and sealing to avoid long-term problems.
Additional Resources
Consult SMACNA guidelines‚ manufacturer manuals‚ and LYSAGHT Roofing & Walling Users Guide for detailed installation instructions and best practices in metal roofing applications.
12.1 Recommended Reading and Guides
For comprehensive insights‚ refer to the SMACNA guidelines and the LYSAGHT Roofing & Walling Users Guide. These resources provide detailed installation instructions‚ safety protocols‚ and material specifications. Additionally‚ consult manufacturer-specific manuals for tailored advice on metal roofing materials and accessories. These guides ensure compliance with industry standards and best practices‚ covering topics from roof preparation to final inspections. They are essential for contractors and homeowners seeking reliable information on metal roofing installation.
Gutter Installation
Ensure gutters are securely fastened to the fascia‚ extending beyond the roof edge for proper water management. Use durable materials like galvanized steel for longevity.
13.1 Effective Gutter Installation Tips
For effective gutter installation‚ ensure gutters are securely fastened to the fascia‚ aligning with the roof edge. Use durable materials like galvanized steel or aluminum for longevity. Position gutters slightly sloped to direct water flow smoothly. Install downspouts strategically to prevent clogging and ensure proper drainage. Secure hangers every 24 inches for stability. Regularly inspect and clean gutters to avoid debris buildup. Use protective guards to prevent leaves and debris from entering. Proper installation enhances water management‚ protecting your home from structural damage and extending the lifespan of your metal roof.