Mr․ Coffee Owners Manual: A Comprehensive Guide
Welcome! This comprehensive guide details Mr․ Coffee operation, from initial setup to troubleshooting․ Explore models like the CG Series and 10-Cup brewers․
Understand safety precautions, cleaning procedures, and brewing instructions․ Discover the history and terminology surrounding this iconic brand․
This manual covers user guides, specifications, and replacement manuals for optimal coffee enjoyment․
Understanding Mr․ Coffee Terminology
Mr․ Coffee employs specific terms crucial for understanding your appliance․ “Mr․” is a respectful title, short for Mister, traditionally preceding a man’s name – like Mr․ Smith – denoting politeness․ Within the Mr․ Coffee ecosystem, “CG Series” designates a particular line of coffee makers with defined features and specifications․
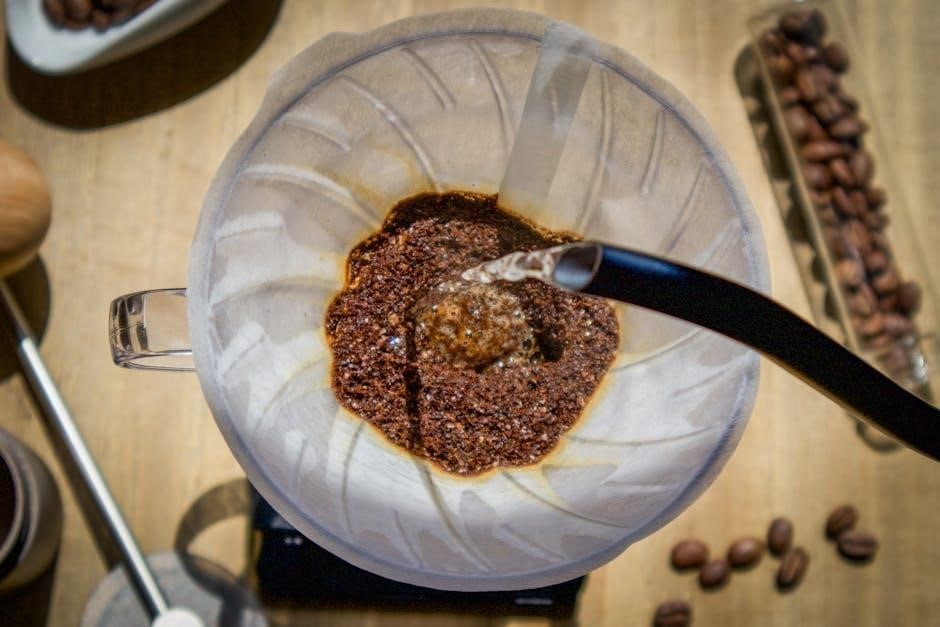
You’ll encounter terms like “carafe” (the glass pot), “filter basket” (holding the coffee filter), and “water reservoir” (where water is added)․ Understanding these components is vital for proper operation and cleaning․ The manual may reference “descaling,” a process to remove mineral buildup․
Furthermore, recognizing abbreviations like Dr․ (Doctor) or Miss (unmarried woman) found in related documentation helps contextualize broader instructions․ Familiarity with these terms ensures a smoother coffee brewing experience and effective troubleshooting;
The Meaning of “Mr․” in Context
The designation “Mr․” within the Mr․ Coffee brand name isn’t a personal address but a historical convention․ It’s an abbreviation of “Mister,” a formal title of respect for men, traditionally used before a surname – for example, Mr․ Green or Mr․ John․ This usage reflects the societal norms prevalent during the brand’s inception․
Its inclusion in the brand name aimed to convey a sense of quality, reliability, and approachable sophistication․ It wasn’t about addressing a specific individual but establishing a brand identity․ The term signifies a courteous and dependable product for the everyday consumer․
Understanding this context differentiates it from instances where “Mr․” precedes a name in instructions or documentation, such as addressing a customer service representative․ It’s a branding element, not a direct form of address within the owner’s manual itself․
Mr․ Coffee: A Brief History of the Brand
Mr․ Coffee revolutionized home brewing, emerging in the early 1970s with the introduction of its first automatic drip coffee maker․ Prior to this, percolators dominated, often producing bitter coffee․ Abe Somoza, a radio engineer, identified a need for a simpler, more consistent brewing method․
The initial Mr․ Coffee model, costing around $30, quickly gained popularity, making convenient, quality coffee accessible to a wider audience․ This innovation fundamentally changed American coffee consumption habits․ The brand became synonymous with automated brewing․
Over the decades, Mr․ Coffee expanded its product line, introducing various models and features․ Despite evolving trends, the core commitment to affordability and ease of use remained central to the brand’s identity․ Today, Mr․ Coffee continues to be a household name, offering a range of coffee makers and related products․

Mr․ Coffee Coffee Maker Models & Series
Explore diverse Mr․ Coffee offerings! From classic CG Series brewers to versatile 10-Cup models, find the perfect fit for your coffee needs and preferences․
Popular Mr․ Coffee Models: An Overview
Mr․ Coffee boasts a wide array of models catering to diverse brewing preferences․ The CG Series consistently ranks as a popular choice, known for its simplicity and reliability, offering a straightforward brewing experience for daily use․ Many users appreciate its ease of cleaning and consistent performance․
The classic 10-Cup models remain a staple, ideal for families or those who enjoy brewing larger batches․ Beyond these, Mr․ Coffee also ventures into specialty brewers like the Café Barista, offering more control over brewing parameters and mimicking café-style drinks․
Other notable models include those with programmable features, allowing users to set brewing times in advance․ Understanding the specific features of each model – as detailed in their respective user manuals – is crucial for maximizing your brewing experience․ Replacement user manuals are readily available online for various Mr․ Coffee series․
CG Series Coffee Makers: Features and Specifications
The Mr․ Coffee CG Series represents a cornerstone of the brand’s offerings, prioritizing simplicity and affordability․ These coffee makers typically feature a 12-cup capacity, though variations exist․ A key feature is the Pause ‘N Serve function, allowing users to briefly interrupt the brewing cycle to pour a cup mid-brew․
Construction generally includes a removable filter basket for easy cleaning, and a glass carafe․ Specifications commonly include a 750-watt heating element for efficient brewing․ The control panel is usually straightforward, with a simple on/off switch․
Users should consult their specific CG Series model’s manual for detailed specifications, as minor variations occur․ Regular cleaning, including descaling, is recommended to maintain optimal performance․ Online resources offer replacement manuals if the original is misplaced․
10-Cup Mr․ Coffee Makers: Detailed Examination
Mr․ Coffee’s 10-cup models are popular for small to medium-sized households, balancing capacity with a manageable footprint․ These brewers generally feature a similar design to the CG Series, emphasizing ease of use․ Key components include a removable filter basket accepting standard basket filters, and a durable glass carafe with level markings․
Operation is typically controlled by a simple on/off switch․ Many 10-cup models also incorporate the Pause ‘N Serve feature․ Specifications often include a wattage around 750-900 watts, ensuring relatively quick brewing times․
Users can find free instruction manuals online, rated an average of 7․5 out of 10 by users․ Proper cleaning, including regular descaling, is crucial for longevity․ Always refer to the specific model’s manual for detailed instructions and safety guidelines․

Setting Up Your Mr․ Coffee Maker
Initial setup involves cleaning, filling the water reservoir, and inserting a filter․ Familiarize yourself with the control panel for optimal brewing․
Follow the first-time use instructions carefully for a perfect initial brew!
Initial Setup and First-Time Use
Before your first brew, unpack your Mr․ Coffee maker and remove all packaging materials․ Thoroughly wash the carafe, filter basket, and any removable parts with warm, soapy water․ Rinse well to ensure no soap residue remains, as this can affect the taste of your coffee․
Place the coffee maker on a flat, stable surface․ Fill the water reservoir with the desired amount of fresh, cold water, observing the water level markings․ Insert a paper filter into the filter basket․ It’s recommended to run a full brewing cycle with just water – without coffee grounds – to clean the internal components and prime the system․
This initial cycle helps remove any manufacturing residue and ensures optimal performance․ Discard the water from the carafe after this first run․ Your Mr․ Coffee maker is now ready for brewing delicious coffee!
Water Reservoir and Filter Basket Instructions
The water reservoir is clearly marked with water level indicators corresponding to cup measurements․ Ensure you fill it with fresh, cold water only․ Do not overfill beyond the maximum line․ Regularly cleaning the reservoir prevents mineral buildup․
The filter basket accepts standard cone-shaped paper filters․ Place the filter securely within the basket before adding coffee grounds․ Avoid using metal permanent filters unless specifically designed for your Mr․ Coffee model․ Ensure the basket is properly seated in its holder to prevent leaks during brewing․
After brewing, carefully remove and discard the used filter and grounds․ Rinse the filter basket with warm water after each use to prevent residue buildup․ Avoid abrasive cleaners, which can damage the basket․
Understanding the Control Panel
The control panel typically features a simple on/off switch, often illuminated to indicate power․ Some models include a ‘Brew’ button initiating the brewing cycle․ More advanced units may offer programmable features like ‘Delay Brew’ allowing scheduled coffee preparation;
Strength selection, if available, adjusts brewing time to influence coffee strength – longer times yield stronger brews․ Familiarize yourself with any indicator lights signaling brewing status (brewing, keep warm)․ The ‘Keep Warm’ function maintains coffee temperature for a set duration, usually around two hours․
Refer to your specific model’s diagram for precise button locations and functions․ Avoid pressing buttons forcefully․ If the panel isn’t responding, check the power cord and ensure the unit is properly plugged in․

Brewing Coffee with Your Mr․ Coffee Maker
Follow these steps for a perfect brew! Add water, a filter, and grounds․ Press ‘Brew’ and enjoy fresh coffee․ Adjust strength to your preference!
Experiment with different filters for varied results․
Step-by-Step Brewing Instructions
Begin by ensuring your Mr․ Coffee maker is clean and properly set up․ First, fill the water reservoir with the desired amount of fresh, cold water, referencing the markings for cup quantities․ Next, insert a paper filter into the filter basket – cone or basket filters are typically compatible, depending on your model․
Then, add ground coffee to the filter․ A general guideline is one tablespoon of ground coffee per cup, but adjust to your preferred strength․ Close the lid securely․ Finally, place the carafe onto the warming plate and press the power button to initiate the brewing cycle․
Allow the brewing process to complete fully before removing the carafe․ Enjoy your freshly brewed coffee! Remember to always unplug the coffee maker when not in use and follow all safety guidelines․
Adjusting Coffee Strength and Quantity
Controlling coffee strength is simple with your Mr․ Coffee maker․ For a bolder brew, increase the amount of ground coffee used per cup – start with an extra tablespoon and adjust to taste․ Conversely, use less coffee for a milder flavor․ Experimentation is key to finding your perfect strength!
Adjusting quantity depends on your model․ Most Mr․ Coffee machines allow you to brew anywhere from a single cup to a full pot․ Simply fill the water reservoir to the corresponding level indicated on the markings․
Remember that the type of coffee grind also impacts strength; a finer grind generally produces a stronger cup․ Consider using different coffee blends to further customize your brewing experience․ Always refer to your specific model’s instructions for optimal results․
Using Different Types of Coffee Filters
Mr․ Coffee makers are generally compatible with standard basket coffee filters, readily available in most supermarkets․ However, some models may benefit from specific filter types for enhanced brewing․ Paper filters are the most common, providing a clean and consistent brew, but can sometimes impart a slight paper taste․
Reusable filters, often made of nylon or stainless steel, offer an eco-friendly and cost-effective alternative․ These filters allow more coffee oils to pass through, resulting in a richer, fuller-bodied flavor․ Ensure the reusable filter is properly seated in the basket to prevent grounds from overflowing․
Always check your Mr․ Coffee model’s manual for recommended filter types․ Using the correct filter ensures optimal performance and prevents damage to your machine․
Cleaning and Maintenance
Regular cleaning ensures optimal Mr․ Coffee performance and longevity․ Daily procedures include washing the carafe and filter basket․ Descaling removes mineral buildup, vital for consistent brewing․
Use baking soda solutions for tough stains․
Daily Cleaning Procedures
Consistent daily cleaning is crucial for maintaining your Mr․ Coffee maker’s performance and the quality of your brewed coffee․ After each use, immediately discard the used coffee grounds and filter․ Thoroughly wash the filter basket with warm, soapy water, ensuring all residue is removed․ Rinse completely․
The carafe should also be washed with warm, soapy water after each brewing cycle․ For stubborn coffee stains, a solution of baking soda and water can be effective․ Avoid abrasive cleaners, as they may scratch the glass․ Rinse the carafe thoroughly to remove any soap residue․
Wipe down the exterior of the coffee maker with a damp cloth to remove any spills or splatters․ Ensure the warming plate is cool before cleaning․ Regularly inspect and clean the spray head to prevent clogging․ A clean machine equals a better tasting brew!
Descaling Your Mr․ Coffee Maker
Descaling removes mineral buildup from your Mr․ Coffee maker, ensuring optimal performance and extending its lifespan․ This process should be done every 3-6 months, depending on water hardness․ Begin by emptying the water reservoir and filling it with a descaling solution – equal parts white vinegar and water is effective․
Place a clean paper filter in the filter basket and run a full brewing cycle․ Once complete, discard the filter and solution․ Repeat the brewing cycle with fresh, clean water two to three times to thoroughly rinse the system, removing any lingering vinegar taste․
Regular descaling prevents clogging, improves brewing speed, and maintains the coffee’s flavor․ Ignoring this step can lead to reduced efficiency and potential damage to your machine․
Cleaning Specific Parts (Carafe, Filter Basket)
Regular cleaning of the carafe and filter basket is crucial for maintaining coffee quality and hygiene․ The carafe should be washed after each use with warm, soapy water․ For stubborn stains, a weak baking soda solution can be used, but avoid abrasive cleaners which can scratch the glass․
The filter basket should also be washed after each use․ Ensure all coffee grounds are removed․ It’s dishwasher safe (top rack recommended) for most models, but check your specific owner’s manual․ Periodically, a more thorough cleaning with a mild detergent can remove coffee oils․
Avoid using harsh chemicals or scouring pads on either component․ Proper cleaning prevents residue buildup and ensures fresh-tasting coffee with every brew․

Troubleshooting Common Issues
Discover solutions for Mr․ Coffee problems! Address issues like the coffee maker not turning on, slow brewing, or leaking․ Find quick fixes here!
Resolve common errors and keep your coffee flowing smoothly with this helpful guide․
Coffee Maker Not Turning On
Is your Mr․ Coffee refusing to power up? Several factors could be at play․ First, verify the power cord is securely plugged into both the coffee maker and a functioning electrical outlet․ Test the outlet with another appliance to confirm it’s delivering power․
Check the circuit breaker or fuse box; a tripped breaker or blown fuse can interrupt power․ If the outlet and breaker are fine, the issue might be internal․ Inspect the power cord for any visible damage – fraying or cuts could indicate a problem․

Consider the automatic shut-off feature․ Some models have this safety mechanism․ Ensure the carafe is correctly positioned on the warming plate, as a missing carafe can prevent operation․ If none of these steps resolve the issue, professional repair or replacement may be necessary․
Always prioritize electrical safety!
Coffee Brewing Too Slowly
Is your Mr․ Coffee taking an eternity to brew? Slow brewing is often linked to mineral buildup․ Descaling your coffee maker is crucial! Minerals from water accumulate over time, restricting water flow․ Use a descaling solution or a mixture of water and white vinegar, following the manufacturer’s instructions․
Check the filter basket․ An overfilled or improperly seated filter can impede water flow․ Ensure you’re using the correct filter type and that it’s not clogged․ Consider the coffee grind; a too-fine grind can also slow down the brewing process․
Inspect the water reservoir for any obstructions․ Finally, a malfunctioning heating element could be the culprit, potentially requiring professional repair or coffee maker replacement․
Regular maintenance prevents this issue!
Coffee Maker Leaking
Discovering a leaking Mr․ Coffee can be concerning! First, ensure the carafe is correctly positioned on the warming plate․ Improper placement is a common cause․ Check the water reservoir for cracks or damage; replace it if necessary;
Inspect the filter basket․ Overfilling or a poorly fitted filter can lead to overflows and leaks․ Confirm you’re using the appropriate filter size and that it’s securely in place․ Examine the connections between the reservoir, filter basket, and carafe for any signs of wear or damage․
Mineral buildup can also cause leaks․ Descaling your Mr․ Coffee regularly can prevent this․ If leaks persist, professional repair might be needed․ Always unplug the unit before inspection!
Preventative maintenance is key!

Safety Precautions
Always unplug before cleaning․ Avoid hot surfaces․ Use caution with steam․ Keep the appliance away from water sources and ensure proper electrical safety․
Handle with care and follow all instructions for safe operation․
Important Safety Instructions
Read all instructions carefully before operating your Mr․ Coffee maker․ To reduce the risk of fire, electric shock, or injury, always follow these essential safety guidelines․ Never immerse the appliance in water or other liquids․ Unplug from the outlet when not in use and before cleaning․ Allow the appliance to cool completely before disassembling․
Do not operate the coffee maker with a damaged cord or plug․ Avoid using extension cords․ Supervise children closely when the appliance is in use․ Hot surfaces can cause burns; use handles or knobs․ Never open the brew basket during the brewing cycle․ Ensure the carafe is properly positioned before brewing․ This appliance is for household use only․ Follow cleaning instructions diligently to maintain safe operation․
Caution: Hot steam and water can cause severe burns․
Electrical Safety Guidelines
Prioritize electrical safety when using your Mr․ Coffee maker․ Ensure the voltage of your outlet matches the appliance’s specifications․ Never operate the coffee maker with a damaged cord or plug – replace immediately․ Avoid using extension cords; plug directly into a grounded outlet․ Do not operate the appliance with wet hands․
Unplug the coffee maker before cleaning or when not in use․ Never pull the cord to disconnect from the outlet; grasp the plug instead․ If the appliance malfunctions or the cord is damaged, discontinue use and contact qualified service personnel․ Do not attempt to repair the appliance yourself․ Keep the appliance away from heat sources and water․ Regularly inspect the cord for damage․
Caution: Electrical shock can be fatal․ Follow these guidelines to prevent accidents․
Proper Usage and Handling
Handle your Mr․ Coffee maker with care to ensure longevity and optimal performance․ Always use a stable, level surface for operation․ Avoid placing the coffee maker near heat sources or water․ Do not operate the appliance if it’s damaged in any way․ Use only genuine Mr․ Coffee replacement parts․
Never immerse the appliance in water or other liquids․ Allow the coffee maker to cool completely before cleaning․ When brewing, avoid overfilling the water reservoir or filter basket․ Do not touch hot surfaces during or immediately after brewing․ Exercise caution when handling the carafe, as it may be hot․ Store the appliance in a cool, dry place when not in use․
Regular maintenance and careful handling will extend the life of your Mr․ Coffee maker․